Vintage Store Counter Island

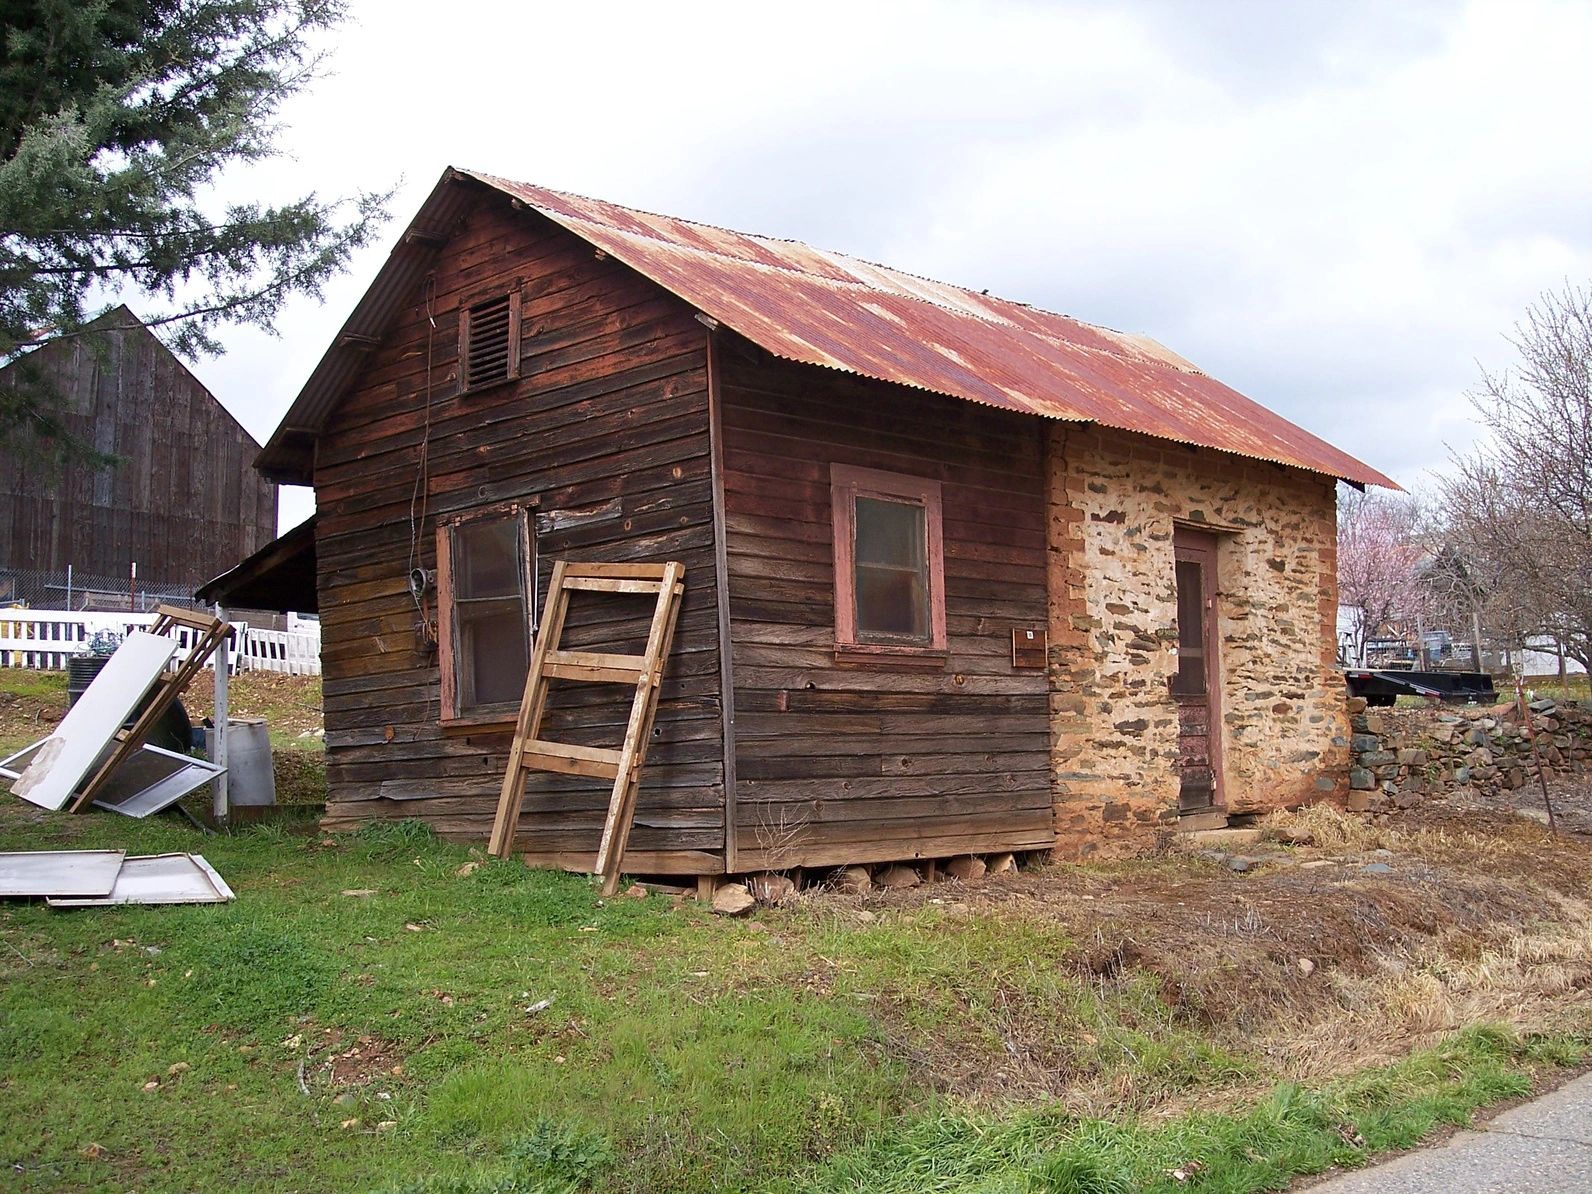
Say hello to Mavis! She’s a vintage general store counter. Isn’t she beautiful!? (Thanks to my friend Jamie at @RubbishFarm she’s merchandised in the cutest way, too!)

As I created a plan for our new home, a huge kitchen island was a must for me. And me being me, I didn’t want some off-the-shelf shiny new thing, I wanted a piece with character, a statement piece. I pinned so many various islands on Pinterest and Houzz and the couple that made my heart soar were old store counters. People have done some amazing things with them and they fit right in with my industrial/French cottage/farmhouse design plan. However, they did not fit right in with my budget. These things are spendy!

Like most things I want, I knew what I wanted and knew if I was patient, I would come across the right thing, at the right time, at the right price. And viola! it happened one evening while checking FaceBook!

Jamie @RubbishFarm finds the best stuff and offers it to us (at great prices, too) during her barn sales. She posted a photo of her latest find and it was exactly what I was searching for! Within minutes of her posting it I responded I loved it and wanted it. It took a little while to secure it–and actually Mike surprised me with it for my birthday!–but, she is ours and we have big plans for her. (And I really am not in the habit of naming furniture, but Jamie thought she deserved naming and I agree.)

I’ve kicked around so many design ideas and in the end I’ve decided I do not want to hide one inch of this amazing cabinet, so rather than add a bank of cabinets to the front (paneled) side, we are going to build-out a frame, supported by two chunky posts (also a RubbishFarm find) to double the depth of the countertop. When finished she will be a whopping 9’x4′ and have seating for six.

Mavis will keep her beautiful patina and I’ll match the frame and legs to her, as well as tone down the green on the paneled side. Just a little tweaking and a couple heavy coats of matte poly to keep her, and us, safe.

One contentious issue has been the top. It has an amazing, chippy, patina, but I need a work surface and no matter how much sealer I put on it, I wouldn’t feel comfortable cutting, chopping, and rolling dough on it. Besides, trying to match the original wood to create a larger top wouldn’t be easy either. I think it’ll get a new life elsewhere where food prep contamination isn’t a concern.

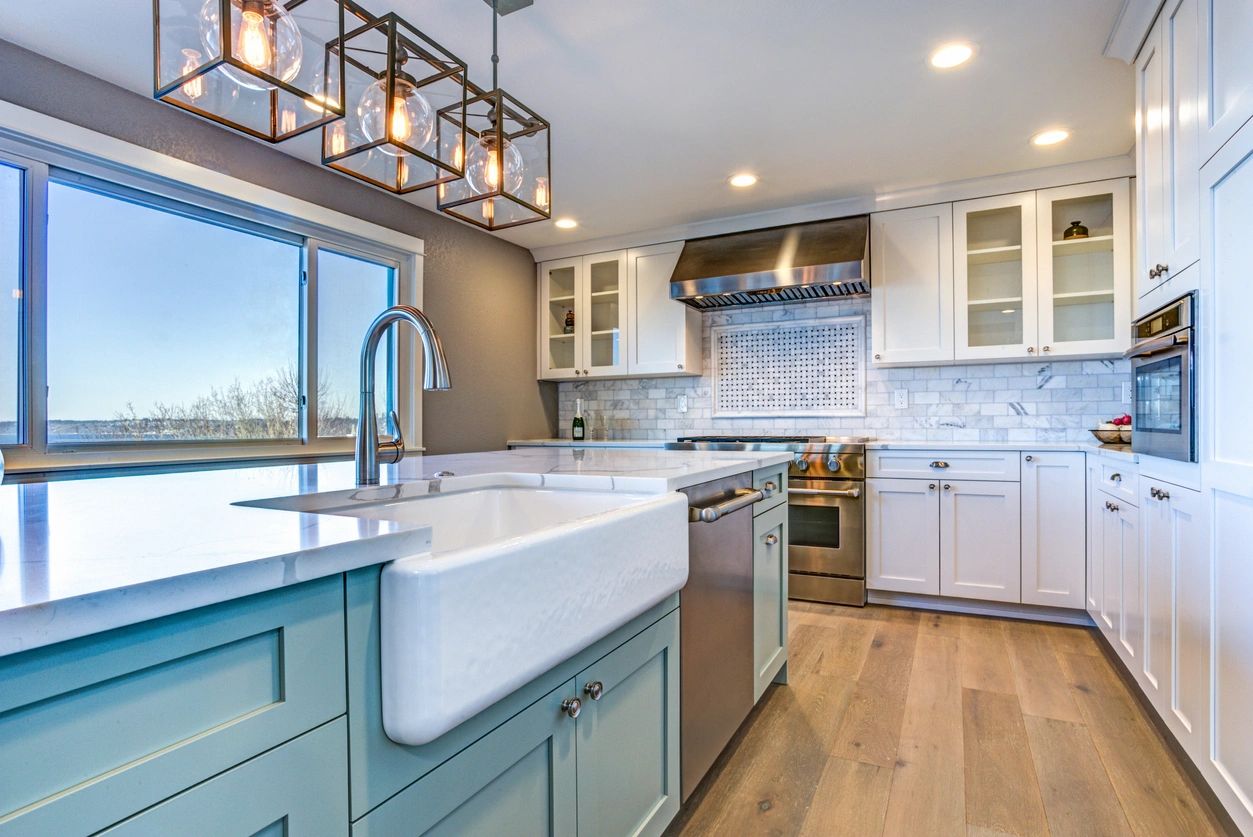
It appears the back/open side once had sliding doors, but we’ve decided we like the open look and will incorporate bottom drawers something similar to these to give us easy access and organization, but keep the open look.

The upper drawers will house knives, cooking utensils, etc. so we will have a more closed look–something we can secure from eventual grandchildren–but we are considering some type of crate design like the following. These details can come once we get her in place.

We will also incorporate a small prep sink and while I found a darling galvanized one, I may continue my look for a vintage brass sink or bucket we could retrofit.

Since our primary countertops will be a marble-look, I’m probably going to use an artificial soapstone on this piece, if I can get one that is more gray than black. Other options include a thick butcher block or even concrete.

The beauty of repurposing a piece is that the options are unlimited and the end result is what works best for the user. I can’t wait until we get our hands on Mavis and start her transformation! You can bet when it happens, you’ll see it here.

Have a beautiful day!

Tina

A Quick Round Stool Update

I love finding discarded and/or thrift store finds that only need a few minutes of love and attention to totally change them into something fresh! As I embarked on my camper redo (still progressing on that), I knew space was limited, as would be seating, so I was looking for anything that could serve double-duty.

I came across this little stool for less than $5 and knew it would be the perfect piece to create an extra seat, an extra surface for items, AND to bring in a bit of whimsy to the place. (Keep in mind I’m going for a mid-mod vibe).

I began by flipping it over and removing the screws that held the seat to the frame. Once the parts were separated, I took the base outside, gave it a very quick light once-over with sandpaper (it has a weird plastic coating), then freshened it up with gold spray paint.

You see my fancy paint booth there? If it’s a still day, I often spread a tarp on which I paint, but if there is any wind, I try to contain as much of the overspray as possible, just so I don’t end up with paint on the driveway, cars, or even on the plants. Obviously, neither is necessary, but simply my preference.

As the paint dried, I returned to the cushion. Placing my fun, fuzzy fabric face down on the table, I then placed the cushion–also face down–on the fabric. I pulled up one edge of fabric to get an idea how much excess I needed for stapling. In this case it was about 3″ so I cut a rough shape about 3″ beyond all edges of the cushion.

To attach the fabric, start by placing one staple through the fabric into the wooden cushion base. Next, pull the fabric taut directly opposite that first staple and place another. Then complete the process for the two sides. Once you have four cardinal points adhered with staples, you’ll focus on the area between two of these stapled points. Place a staple in the center of two of the cardinal points (work within one area at a time), and then, alternating between the fabric on the right then the fabric on the left, pull the fabric up, work in the excess and place a staple. You want to keep your fabric taut, but don’t pull so hard that it becomes crooked or you steal the excess from the opposite side and leave nothing with which to work.

Rotate the cushion 180 degrees and do the same for the opposite side. Continue until you have all the fabric stapled securely. Once you’ve finished, feel free to cut off the excess.

At this point, my base has dried and is ready to reattach. I reversed the process…place the frame upside down onto the cushion base, and reinstall the screws.

Viola! A cute little stool, side table, (but not suitable as a lamp table), fluffy butt piece for the camper!

Until next time, stay calm and project on!

Tina

Today’s Home Buyers Have Been HGTV’d

I’m a huge fan of HGTV. My favorite shows are more about rehab than buying/selling, but I watch those too and those are what I’m on my soapbox about today.

I cannot count the number of times I’ve cringed when a potential home buyer starts with their I want list, because the majority of the items are so superficial and inconsequential! Oddly, it seems the younger the buyer and the tighter the budget, the longer and more inane the I want list.

As a home buyer, there are definitely pros to watching such shows–they give a general overview of the process, they often indicate the true reality of homes in a price range, and they occasionally give home buyers a new perspective on what is truly important when purchasing a house–and it’s not white cabinets and shiny appliances!

Seriously. So many times a home in a gorgeous setting, safe neighborhood, and good schools is passed by because the cabinets are too dark or the bathrooms are dated. Cosmetics, people, cosmetics! Somewhere along the line the adage of “location, location, location” has slipped down the list of importance, only to be replaced by ship-lap, hardwood floors, and open-concept living. With all this HGTVing of buyers, it’s an interesting time to be buying or selling a home.

When we purchased our current home, our agent understood location, commute and schools were our priorities. However, when we began our next home search a couple years ago, the agent wanted to show us everything with 2+ acres. It didn’t seem to matter the commute was 70 minutes each way, the house was too remote, the price was severely over budget or the home was nothing like we wanted. She so easily overlooked every item we wanted/needed, except the size of the acreage. Maybe the game has changed so much that even an agent’s role is not what it was–just make a sale and move onto the next client?

Even now, while selling our home, we got feedback from one agent stating, “I don’t like the country decor.” (And for the record, it’s not even country, it is light farmhouse/French farmhouse.)

Well I’ll be! Last I checked it was an agent’s responsibility to help a potential buyer see themselves in the home–to guide them past personal decor and belongings, instead of highlighting them as they’re permanent fixtures to be worked around. People, you’re NOT buying another person’s things, so use a little imagination in seeing it all gone. Yet, you know, it happens all the time on HGTV. I want to reach out and slap someone when I hear, “I don’t like the sofa” or “That bedspread is awful!” So what!? Why does HGTV even air such ignorant comments? In my opinion, all it accomplishes is setting up potential home buyers for failure when they think they need to focus on decor versus location, condition, price, commute, schools and the home’s layout.

At the other extreme are those who’ve never done more than tighten a bathroom faucet, yet they insist on buying a dilapidated fixer upper with the intention of DIYing and flipping it because they’ve seen it done on HGTV and there is a lot of money to be made. Yeah, about that…keep in mind the true flippers–Bargain Mansions, Flip or Flop (take a clue from the name!), Good Bones, and Home Town–have done this a long time and have subcontractors and a whole host of help behind the scenes. It’s never as easy as “we will just tear down this wall, gut the kitchen, and viola! it’ll be worth three times what we paid!”

I know realty agents/brokers all have ongoing education…I truly hope some of that education is on how to overcome the HGTVing of today’s home buyers and to focus on providing the service and direction that is necessary to help home buyers make the best decision for their home purchase. Pointing out important items, like safety of community, rating of schools, lifestyle, commute, and a home that works for them now and into the future, should not being cast aside in lieu of pointing out a shiny new light fixture, trendy countertops or other items that come and go out of style.

I’m also a fan of Bravo’s Million Dollar Listing shows and at the price point of those homes, I say you should have and get everything on your I want list.

However, the average home buyer isn’t at that level and needs a good agent to help them understand life is not an HGTV show. Focus must shift to needs and the wants can come later. No house is perfect, but that doesn’t mean it isn’t the perfect HOME.

Until next time,

Tina

Did You Know You Can Dye Carpet?

We recently purchased an older travel trailer and I proclaimed, “I can fix it up for $500 or less!” Mike countered with “How about $300?” I had no intention on budging off of $500, but was intrigued if I could do it for $300.

The trailer has what I believe may be the original carpet, but the vinyl had recently been replaced. I created a mid-mod plan, which included changing out the new vinyl tiles and the old carpet. Then I went shopping. The least I was going spend on carpet–if I got a remnant to work–was $150 and the new vinyl flooring would run another $100. My $300 budget? Nope, not happening, but that’s not what this post is about. I bagged the idea of replacing the flooring and decided instead to resort to an old trick I have…clean and dye the carpet.

Years and years ago, my father-in-law had a company come out and dye some rental property carpets. Of course, they had huge carpet sprayers and cleaners in a van, but I took note of the process and when I had some carpet in need of replacing I decided to try my hand at dying with common RIT Dye…I had nothing to lose since the carpet was done-for anyway.

The process I used then, and twice since then, is quite simple. It may not be the professional way, but it works. If you’re in need of a carpet refresh, this may be the trick for you. HOWEVER, please do not attempt this on a large scale without first testing it! I am not, in absolutely ANY WAY responsible, for the results you achieve or damage you cause. Just saying.

Now here’s the thing, there is no magic formula for mixing the liquid dye for this application, but here is my method: 8 oz of liquid dye to 8 cups of water (hot is preferable, but I’ve found cold works just as well). I also cannot tell you the exact coverage you should expect. I know, lame. But…I just finished dyeing 70sf and used four 8oz bottles (mixed two colors) which allowed me to dye everything then go back over with a light coat. So, a rough formulation is 2 gallons (plus the 32oz/4 bottles of dye) covered 70sf, so you can expect 2 bottles of dye plus 1 gallon of water to cover approximately 35sf.

Note: You always want to go darker than the color you currently have and if you test the above mixture and find it too dark, simply add water; if too light, add more (or darker) dye.

Before starting, you’ll need the following supplies:

  • Carpet cleaner machine and carpet cleaning solution
  • Spray bottle or pump-up sprayer
  • RIT dye in your chosen color
  • Rubber gloves
  • Rags/towels
  1. Begin by cleaning your carpet. This step is important because it helps minimize stains and by wetting the carpet, it helps the fibers absorb the dye.

Note: RIT now makes a dye for synthetics. I have not yet tried this and I would have loved to, but it wasn’t available in the color I chose. As most carpets are synthetic–and if you have wool, I wouldn’t dare attempt dying yourself–this may work even better!

2. Prep your space by protecting the baseboards around the perimeter. I found running tape along the bottom where the baseboard meets the carpet is generally enough, but if you prefer more you can use plastic wrap taped at the top and tucked in under the baseboard. (I wasn’t worried about this step in this particular circumstance, so I skipped it).

Note: Use rubber/latex gloves! (And wear shoes). The dye is pretty intense and hard to get off your skin and will transfer as long as the carpet remains damp!

3. When you finish prepping, it’s time to mix the dye as above. Once mixed, you’ll want to put it in a spray applicator. I’ve used a pump-up sprayer for large areas like our entire house, but for the trailer I used a spray bottle (although it had a wonky spray pattern that drove me nuts and if I hadn’t been planning to remove and replace the wallpaper too, it would have been a nightmare with the overspray. While it cleaned up nicely off vinyl wallpaper, I’d hate to imagine this on a painted wall).

4. Working while your carpet is still damp, begin applying the dye by spraying along the perimeter of the area then work inward. For best blending of one work area into another, it’s better to do a random edge than a straight edge so you don’t end up with heavy overlapping lines. Sometimes I’m able to get really good coverage with the sprayer, but most times I go back over the wet area with a gloved hand and really work it into the carpet fibers.

Note: Again, through trial and error you will figure out the right amount of spray. You’ll want your carpet thoroughly wet with dye, but over saturating could lead to, worst-case scenario, the dye seeping through the carpet and ending up on a ceiling below if you’re dyeing spaces above!

5. After you’ve finished the area, let it sit for about 15-20 minutes. This is a good time to begin clean-up. Be careful, dye will get on everything!

6. Using your steam cleaner, go over the carpet using ONLY the extraction–do not clean and/or add additional water. You want to draw out as much dye and moisture as you can.

Note: This is a messy business! I own my steam cleaner and would caution against using a rented or borrowed machine to do this, as the dye may stain the machine and if not cleaned properly it will transfer dye to the next surface cleaned!

7. If you see any areas that are obviously lighter than others, now is the time to do a light application to those areas. (Repeat the wait/extract process).

8. You are now done! Allow the carpet to dry thoroughly before use. Directing fans to blow across the carpet will help speed up the process.

Note: If your space is very humid, the dye can continue to leech onto your skin or any fabrics placed on it until completely dried.

9. Clean your steam cleaner to ensure no transfer occurs with next use.

Allow your dye to settle into the carpet fibers for a couple weeks. At that point you’ll either discover you need to do another application (perhaps not as heavily applied) or that you’re quite pleased with the results and are calling it a success. Great, but you’re not done, yet…

I highly suggest pulling your steam cleaner out and cleaning your carpets with just water. Again, be judicious with the amount of water you apply and do not over-saturate them. You will pull off some color, and that’s a good thing…it will help reduce the amount of dye transfer in the future.

I’ve dyed large areas of carpet and even when the actual carpet looked worn down, the dye was still looking good. I believe the last large-scale dye job lasted a good five years!

For now, the trailer carpets are refreshed and ready to go–maybe not another 24 years, but until I get a bump in my budget and/or we want to tackle replacement. For now, I have a few more items to do before I burn through my budget…I’ll share those, too!

Let me know if you attempt carpet dyeing or have any questions…I’ll do my best to answer them.

Tina

The Top 3 Things To Know About Interior Decorating

I dare say I would be hard pressed to find a woman who doesn’t know who Joanna Gaines is and/or what Farmhouse Style is. There are a lot of men who also know, but probably not to the extent of women. For instance, Mike tells our builder I am “doing farmhouse style”, but that is quite inaccurate!

What our design–or for sake of clarity, what my design–entails is a mixture of modern farmhouse, industrial, French country with a splash of glam. Does that sound crazy? It does to Mike and our builder, but to me it simply labels the things I love in a way people can understand.

If you study Joanna’s projects closely, you’ll see, especially in more recent years, she has veered a bit from the straight-up farmhouse to a style that integrates other styles, too. Finally.

Argue with me all you want, but true old farmhouse style is built upon years of life lived in a home, a collection of finishes and furnishings and is mostly timeless. However, the current design trend of farmhouse everything is exactly that–a trend. Like all trends, it will pass. I believe it’s already starting to fade in part because of its overwhelming popularity and availability of manufactured old signs, farmhouse decor, and redundancy. This leads us to point #1.

1. By all means incorporate the latest trends into your decor, but resist the temptation to ditch everything you own and go all-in on the newest look. The risks of going all in are:

  • You end up with a look that is contrived, overdone, and frankly, looks like you simply created a shopping list and went out and bought every item that seems even remotely belonging to that trend. It’s cute, it’s trendy, but is it you? Where is your personality in it?
  • You risk investing dollars in copy-cat manufactured goods that are passe’ within a couple years. When the trend goes out of style, you have no choice but to either live with it or ditch it and start afresh with the current trend, which to me is throwing good money after bad!
  • When people talk of dated interiors, the primary culprits are big-ticket items like carpeting, flooring, appliances, and countertops. If you jump on the band wagon and make everything in your home suit one particular style trend or the color de jour, you risk becoming one of these dated homes in the future and the investment to reverse some bad decisions can be substantial.

So, how do you enjoy the most current looks without committing to it for a lifetime? Accessories are the ticket, but let’s talk about point #2–good bones–first.

2. No matter your style, if you get the foundation right, you can work with what you’ve got through several design trends. The big three to get right are below.

  • Flooring is by far one of the largest investments in your home, so getting it right is kind of a big deal. Once, before learning about interior decorating, I made some really, really bad design choices! The first was not being true to myself and instead of picking carpet I wanted and liked, I simply looked at what my in-laws had just installed, and since my husband loves green, I chose the same green carpet. Not just green, but teal green!

To this day I can walk into a house with it and know it’s from the years 1992-95. That, my friends, is an example of buying into a bad trend. The second bad choice was in this same house–I picked a vinyl tile (you know, back in the day it was the bomb) from a discount store, but I didn’t know it was a discount store with limited quantities until we needed some replacement tiles. My apologies to the people who bought our house…I just didn’t know any better.

As you make flooring choices, a good exercise is to look back over the years and see what flooring choices are still going strong and which have expired.

You cannot go wrong with hardwood flooring that can be stained and refinished multiple times, but pick a black, pre-engineered one that doesn’t allow refinishing and let me know how you feel about it in a few year. Just saying. Carpet will need to be replaced sooner than later, so you have a little more flexibility here. But, don’t do green!

  • Cabinetry is another substantial investment. Again, look at what remains timeless–primarily white and some woods–and weigh the traditional options against your own design style. Right now we have maple cabinets with eyebrow arch doors. I would have painted them white years ago, but this is our home and sometimes Mike does weigh in and this was one item he was dead-set against. I did, however, take liberties with the center island. It was at one time black, and now is a beautiful–to me anyway–shade of blue. Perhaps navy blue cabinetry or trendy colored appliances are exactly what you want, but please ask yourself how long you’re willing to commit to these choices and if you change your mind, can you paint over the finish or afford to replace? If not, get your color fix by painting your island a fun color, using trendy cabinet hardware or even lighting, along with your kitchen accessories!
  • Countertops are the ficklest item when it comes to current design! My granite is only four years old and was a must-have four years ago, but now most people are opting for Quartz, concrete or other manmade materials. Cultured marble and tile have had their moment in the sun, but don’t even register on most people’s radar these days. There are some materials I feel transcend time and trends: marble, soapstone and butcher block. Formica (laminate) is a necessity for some homeowners, but even that is swinging from the granite looks to more Quartz and marble looks. When picking countertops, unless you have the budget to replace in 5 years, I say go with the most neutral of what is currently trendy and get as much life from it as possible.

Obviously, no one thing is truly timeless and keeping a home current requires updates, but if you take care of the foundations of design, you will get far more for your money in the long run.

3. The Fluff, aka Accessories. Here is where you get to layer your basic foundation with all the fun, trendy things. However, there are a couple things to keep in mind.

  • A little goes a long way. If you’ve been into a Michael’s or Hobby Lobby lately, you can’t turn around without being bombarded with farmhouse stuff. I mean it’s like a serious population explosion!

Do you need those buffalo check pillows, the farm truck pillows and the donkey pillows, along with the buffalo check throw, the sixteen farmhouse/eggs/diner/believe fake porcelain signs, metal cart, chicken print plates, AND mason jar glasses all in the same space to create a farmhouse look? No, and please don’t; it’s overkill and loses its charm.

Instead, pick a couple favorite items for each area of your home. When you disperse them and integrate them into your design, you get a much more authentic and genuinely pleasing look.

  • I cannot tell you the number of design clients I’ve had over the years who ask, “Is it ok to put this with that?” I’ve never been one to shy away from mixing colors, patterns and textures, but for most people this seems quite foreign. (The first shop I did work for was called Plaids & Stripes–I think that in itself is what drew me to them, as I got the impression they loved good design and weren’t slaves to the shoulds.)

So let’s talk about what works together: If you like it, it has special meaning to you, and/or you cannot replace it, then it can work! My education is in fashion design, so when I need to communicate past a client’s bias toward mixing styles, colors, patterns, etc. I bring it back to getting dressed.

When you dress, you generally put on pants–or your foundation color. Then picking out a blouse or shirt is easy…you find one you like, feel good in, or that compliments the pants. You may now want to add a sweater, vest, jacket or shawl. Again, you make your choice on what complements what you’ve already pulled together. From there, you add shoes–maybe even complementary socks or hose–and a tie or jewelry.

Most of us manage to appropriately dress every day, so applying the same mindset to interior decor makes it far less daunting. Now, if you’re one of those people who love two-tone shoes with stripe pants, a floral shirt, plaid jacket and paisley tie…you may want to hire a professional for some guidance. Otherwise, create your space to reflect your lifestyle and your preferences and you will find it to be a comfortable environment for you and your family!

And let’s be real here, you’re going to make some questionable choices–as do I from time to time–but, if you err on the side of caution and make those choices with regard to accent items rather than foundational ones, you’ll look back at them in the same way you do a bad haircut: it really was fashionable at some time, but thank goodness you’ve outgrown that fashion statement!

Have fun, relax, and surround yourself with the things you love.

Design a site like this with WordPress.com
Get started